Sunday 4 December 2011

Wool Sale - 1 December 2011

On Thursday of this week we travelled to Sydney with our wool broker, Rowan Woods of Jemalong Wool, to see our recent clip sold. Another grower, Paul who has a property not far from Orange, joined in the trip as well. It was a most enjoyable day, although a tad more adventurous at the start with us finding ourselves traversing 5 flooded causeways up to 0.8 metre deep and running into a kangaroo on the way to Forbes.

THE MARKETING PROCESS BEGINS AT SHEARING
The sale process for us actually begins during shearing. Rowan has an excellent understanding of the wool market and comes out to our place at the start of the shearing. He works closely with the wool classer and other team members to give guidance on how best to prepare and sort each fleece in order to maximise eventual sale price. Market preferences do change from time to time. The wool classer we had this year was totally open to this type of input and on at least one occasion subsequent rang Rowan to check on a couple of aspects.

WOOL SAMPLE TESTING
On receipt of our consignment of wool the team at Jemalong Wool arranges for each line of wool to be objectively and independently sampled by representatives of Australian Wool Testing Authority Limited (AWTA). The most critical measures are listed below, together with some commentary on our ability to influence the results on farm:

Micron (Mic)– Average diameter of the fibres in the sample measured in micrometres (microns). Driven primarily by genetics, but impacted by the age of the sheep (finer in younger sheep) and nutrition. Our sheep always have plenty of grass to eat but our soils are light, we don’t ‘improve’ them through adding fertilisers and the species are primarily low to mid range nutrition natives. The micron of our main line of older ewes has stayed constant or in fact declined since we bought them. Our wool is on the finer end of the scale at 17 to 20 microns. As a general rule the finer the micron the higher the price per kg clean.

Length (MM) – Average length of the wool in millimetres. Genetics does have a role to play in that generally the finer the wool the slower the rate of growth. Leaving aside the impact of individual animal variation and nutrition this measure is one we can control to a high degree through altering the time between shearings. It is a balancing act though as we also need to take into account animal welfare. It’s important to us that we try and shear not long before the spring grass growth runs to seed as the seeds then have less of an impact on both the animals and through seed ending up in the wool sample (more on this later). In an ideal world and looking solely at this measure the goal is to shear as infrequently as possible at the point when there is no risk of the market penalising the price per kg due to it being over or under preferred length. According to Australian Wool Innovation research the ‘ideal’ merino wool length is 85-90 mm. The finer the wool the more susceptible it is to price discounts for any faults, including length.

Staple strength (S/S Nkt) - A measure of how much force is required to break a wool staple. Recorded as Newtons per kilotex (Nkt), this refers to the force/pull (Newtons) required to break a staple of given thickness (kilotex). Management has a significant impact on staple strength through ensuring adequate animal nutrition and minimising stress through the growing. Results above 40 Nkt are ideal. Significant price discounts kick in when the staple strength falls below 30 Nkt.

Position of Break (POB) - is measured in conjunction with staple strength and is a measure of the position in the staple (base, mid or tip) where it will break given enough force. Every staple has a point somewhere (just like a chain has a ‘weakest link’) where it will break. The POB is useful in processing since it provides the processor with an indication of where fibres are likely to break, and thus the length of the broken fibre sections. To quote from the AWTA website: “Strength and midbreak percentage are the two most important factors in determining the combing performance of wool. Many mills will specify a strength minimum along with a maximum midbreak percentage for their deliveries, thereby placing increased price pressure on low midbreak types and magnified decreases in wools displaying a high midbreak percentage.” We shear once a year and so far have had excellent ‘position of break’ results. Our POB has tended to not to be in the middle of the staple but we are happy to concede this may be due more to good luck than good management. Our theory is that the staple is likely to be weakest at the point in time when the animal experienced the most stress or change during the year. This could be dietary (moving from high to low nutrition or vice versa), environmental (cold or heat shocks), parasite / sickness burden (flies or worms to name two examples) or at different times in the breeding cycle (such as lambing). We move or sheep regularly, there is not a big variation in feed quality between paddocks, we don’t substitution feed (e.g. feeding hay or grain) and the animals always have access to mineral supplements. We rarely have issues with flies and cull those that do get blown and due to the regular moving to fresh pastures which have had long rest periods we’ve found that worm burdens are not high. Sheep are more susceptible to heat and cold shocks when the wool staple is short and to heat stress when carrying full wool, especially when they are grazed in conditions where there is no or limited shelter. Most of our paddocks have good stands of paddock trees and the topography allows for animals to find spots with less wind. Our lambing occurs not long before shearing. Given these factors it might well be that we can take credit for our good POB results!

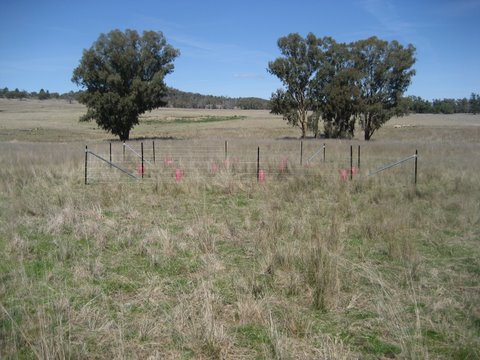
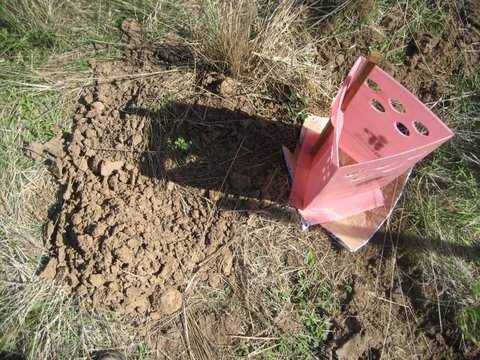
Vegetable Matter (VM) - the percentage of VM found in the greasy wool core-sample. To quote from the Australian Wool Innovation website: “The presence of VM in wool is considered a disadvantage as its removal during processing can be costly. Depending on the severity and type of Vegetable Matter, the wool may need to undergo additional processing called Carbonising. Carbonising is a relatively complicated and expensive process which adds to the cost of the final product. It involves passing the wool through sulphuric acid bowls and ovens, before rollers crush the brittle VM that remains. As well as being slower, carbonising usually involves higher fibre loss than other processing methods”. The main types of VM we have on Ochre Arch are Bathurst Burr (not really a problem), Barley Grass (due to our sheep style we’ve not found this to be especially problematic) and Corkscrew Grass (this is a serious issue for our sheep). Barley Grass and Corkscrew Grass fall within the definition of ‘shive’. Again to quote from the AWI website: “In combing wool, fibrous types of VM (shive) are the most difficult to remove for processors as they align themselves with the fibre during combing and can pass through to the final fabric. Consequently these types of VM carry the largest discounts.” Historical records show that discounts for shive kick in when the amount exceeds 1.5%. We have not experienced this level yet but were not far from it this year. The main recommended strategies to reduce the impact of VM include grazing management (grazing planning, herbicide application and slashing), timing shearing to be immediately prior to the worst time of year for the most problematic species, and placing coats on the sheep that reduce the impact of the seeds. Last year we had one heck of a learning experience with the Corkscrew grass which manifested in the loss of some lambs. This year our strategies include shearing timing and grazing planning. With grazing we kept animals in the paddocks that have the most Corkscrew grass up until seeding started and have subsequently had them in paddocks with much fewer Corkscrew plants per hectare. We’ve about 1 month to go before we will be through the peak of the Corkscrew grass season. If we find that our grazing strategy does not prevent significant lamb losses we may need to look at altering our enterprise mix.

Yield: A measure in percentage terms of the amount of actual wool in the greasy wool sample. The non-wool components of greasy wool include vegetable matter, lanolin (wool grease) and other contaminants such as dust. Management can have a significant impact on yield through actions such as maximising grass ground cover thus reducing bare ground / dust. We are big on doing this here on Ochre Arch. The higher the yield the higher the amount paid per kg greasy.

Other Measures: There are also some subjective measures that can have a material impact on the sale price. Possibly the highest impacting of these is the presence of Dark and Medullated (hollow) Fibres (DMF) in the wool sample. Off the back of this Australia now has a Dark and Medullated Fibre Risk Scheme which is basically an assurance declaration that is coded and included in the wool description summary for buyers to review. Its purpose is to try and preserve Australia’s reputation as the premier white fine wool producing country in the world. Some of the main factors within the measure that have the biggest impact on wool price are:
  • Merinos being mated, reared and/or run with ‘exotic’ sheep breeds such as Awassi, Damara, Dorper and Karakul
  • Sheep aged 8 years or older
  • Not crutched at all or crutched longer than 3 months before shearing
BUYERS’ ACCESS TO WOOL SAMPLE AND INFORMATION
The AWTA, as mentioned previously, takes samples from each line of wool from each grower. Some is used for detailed analysis and the rest is placed in sample bags and sent to the wool centre that codes and displays it in sequentially numbered wool lots. The original bales of wool are held at the broker’s locale and remain there until sold.

The following photograph is a macro view of the huge wool centre shed at Yennora in Sydney.
The following photo shows our own wool ‘closer up’ in the sample bins.
Buyers are given a printout of the analysis as well as access to all of the wool samples prior to auction.

WOOL AUCTION PROCESS
In the case of the Yennora wool centre there are two separate auction rooms, each with viewing access for growers and other interested parties. Room 1 is dedicated solely to the sale of merino fleeces. Room 2 is for ‘all other’ wool types such as merino pieces and crossbred wools.

At the sale we attended wool was being sold by 9 separate businesses representing growers. Each theoretically provides an auctioneer to sell their lots but in practice some work together. The order of each of the broker’s lots varies sale by sale.

In each of the auction rooms are the following people:
  • Auctioneer – progressively works through each of the lots on offer. Approximately 300 lots are sold per hour meaning that on average 12 seconds are spent on each lot.
  • Australian Wool Exchange sale recorder – person who writes the price and fate of each lot on a running sheet
  • Australian Wool Exchange display board recorder – person who enters each sale result into a database visible to the buyers and visitors
  • Buyers

Each auctioneer takes with her or him a list of the lots they will be auctioning together with details of any reserve prices  agreed with growers and a possible bidding start price which helps get things going. Each lot as it is dealt with by the auctioneer is displayed on an electronic board. The details shown are: Lot number, Broker, Price, Buyer and in the event that the reserve price for a particular lot is not reached the letters ‘PI’ (passed in) are posted on the board. There is a convention in place that allows buyers to place a lot they have purchased back up for auction provided this is done before 9 subsequent lots have been auctioned. This allows them to correct errors they may make.

We estimate that there were 12-15 buyers in each of the auction rooms. The reality though is that the majority of wool is purchased by 3 major companies. We were surprised to learn that one of these is in fact a cotton producing company. Obviously they use there skills to acquire and process both wool and cotton – both natural fibres.

The results of the auction of each line are verified by AWE staff and made available shortly thereafter to the brokers in electronic format.

GROWERS’ ACCESS TO WOOL INFORMATION
Jemalong Wool is big on providing its growers with timely and accurate information. Wool sampling results, including nett weight per line, are accessible via user ID and password based login on their website. They also provide a succinctly formatted summary before the auction which includes an estimate of sale price per kg and total gross proceeds.
Immediately after the auction the staff back at Forbes receive from AWE the electronic sale results file which is then fed into the computer system. Generally each grower can access sale results within 2 hours of the auction completion and it is normal practice for Rowan and his team to also call each grower within the day to advise results.

GROWERS RECEIPT OF NETT SALE PROCEEDS
At the same time as grower advices are prepared Jemalong Wool also issues invoices for payment to the successful buyers of each lot. The buyers have 2 weeks to pay Jemalong Wool and Jemalong Wool pays the growers at the same time. This then means that Jemalong Wool is not exposed to credit risk. A question we did not ask but in hindsight should have was “What happens if the buyers do not pay”?

SALE RESULTS
In the overall scheme of things our wool was in good order with no major faults. Our overall returns were higher than for the previous year due to higher volume and comparatively higher prices per kg for the non-top line. The price per kg for our top line was in fact less than in 2010. The market was ‘softer’ than the pre-sale estimates supplied by Jemalong Wool but not materially so. We agreed with Rowan not to set reserve prices for our wool for a variety of reasons.
The main advantages of actually attending the auction are that we get to see the results of auctions of many more wool lines and can learn from this, and we get to spend quality time with our host and his other guests and contacts. In Paul’s case he produces substantially more volume at finer micron than our own. It was most curious indeed that the buyers on the day simply were not aggressively looking for wool at the finer end of the market. Consequently the auction prices for Paul’s wool were only marginally higher than our own, and his two main fleece lines did not reach the reserve. The major learning for us was that the market is ‘moody’ when it comes to fine wools. Paul is likely to re-offer his two fleece lines for sale early in 2012. Jemalong Wool is happy to keep the wool not sold in the warehouse. They do, though, charge holding fees after a reasonable period.

Sunday 20 November 2011

Tallabung Mountain Telstra Tower Outage

First thing on Thursday morning 17/11/2011 we noticed we had no signal for our wireless internet connection or mobile phones. This is not unusual as on occasions Telstra carries out maintenance activities. By lunch time there was still no signal so we decided to call the Telstra technical support number to resolve the issue. After selecting various options on the automated voice response we were put through to a consultant, who it turns out is based in the Philippines. He carried out some searches which suggested there were no problems with any of the communication towers in our area and proceeded to get us to de-install and re-install the software on our PC for our BigPond wireless connection.

During the reinstallation process the phone cut out and we were basically left in ‘no-mans land’. On calling back the technical support unit we were put through to a representative of the ‘Customer Excellence’ team (still in the Philippines) given that our service problem had not been resolved on the first call. It was at this point we were basically told that we were at fault because we did not still have the original installation CD from when we bought our USB modem and set up the internet plan. We were also informed that the software could be downloaded from the internet; but obviously this was not acceptable to us as we no longer had internet access! The option put to us was to ring the Young Telstra franchise store to see if they had a copy of the software. We did this and were told that they had received about 25 recent calls from customers located west of Grenfell through to around Temora suggesting that one of the Telstra towers was experiencing an outage, and that they did not have a copy of the software but have a consultant who comes into the store on Wednesday afternoons who might be able to assist with re-installing the software.

We put another call into the Telstra technical support team and ended up speaking with a different member of the ‘Customer Excellence’ team. They had been incorrect in telling us that that there were no outages with any towers and they had also misled us by getting us to de-install the software from our PC. Off the back of this we sought approval to contact the consultant that goes to the Young Telstra store and get him to re-install the software, with Telstra to pick up the tab for the cost. On the cost side we explained that we would be prepared to travel to the consultant at our own expense, and thus they would only be up for the cost of the consultant’s time. Our suggestion and the background to it was communicated to the Telstra ‘complaints’ unit, with us being given a complaints reference number, a phone number for the complaints team and told that the matter had been logged as urgent and that we might get a call within 24 hours. The consultant also told us that he had arranged for a copy of the software we needed to be posted to us and that it might reach us in 5 working days.

To us connection with the internet is important as aside from personal use it is also handy for our farm and consulting activities. We were not prepared to wait indefinitely for a telephone call from the Telstra complaints team so rang them first thing Friday 18/11/2011. The case manager assigned to us read the background from their case management system and we also explained what had happened. Her initial stance was that Telstra would not pay for the consultant’s time, that the only option was for us to wait until we received the software CD, and that Telstra does not have any technical support people that do face to face work (all of them can only be accessed by phone). She put a call in to the Telstra technical area and was told that there were no outages in our area. We put it to her that she was thus basically saying that the person we’d spoken to at the Young Telstra store the day before was a liar, and asked her to call him. She did this and we were pleased that from that point on she was no longer implying we were lying and insisting that the problem was not at their end.

Telstra has an internal database called something like ‘Network Wellbeing’. From this customer service staff can do searches to indentify reported problems with communication towers and the like. After quite a bit of searching our complaints case manager found that the Tallabung Mountain Telstra Tower had been experiencing an ‘outage’ since late on 16/11/2011. We can see this mountain from our verandah, happen to know it is located about 30 km in a direct line, were aware that it had communication towers on it but believed they were owned by Optus and Vodafone. . Until that point in time we did not know that Telstra also had a tower on it and that it was the source of our Telstra wireless and mobile signals. We finished the call with our complaints case manager with agreement that they would waive a full month of our total telecommunications fees and call us every two days until we had connection installed, and that we would try and access the consultant who works out of the Young Telstra store at our own expense.

We called the Grenfell Internet Centre and were pleased to learn that they were willing and most likely able to get our PC software issue resolved. Later in the day we took the PC to them and it was up and running within about an hour. By yesterday morning our signal was back up and running i.e. we were ‘back on the air’.

The key lessons others might like to consider taking from our experience are:
1. Get to know your signal origin tower name. This information can be found on most mobile phone bills. It is from this that you will be able to give sufficient information to the telecommunications provider when something goes amiss. We'd have saved ourselves a lot of angst had we known this when we first called for help.
2. Be wary of the advice that comes from the technology support team.
3. If asked to de-install software first check to see if you still have the original installation CD on hand
4. Don’t be bull-dozed by the complaints case managers and stay focused and determined in dealing with them. They do have authority if pressed to at least temporarily waive plan fees to help compensate you for the run-around where errors do occur. They are performance assessed based on complaints closed at minimal cost and our experience suggests that the culture, policy and processes centre on not believing what complainants say.

Having made the last point above we are not suggesting that Telstra’s staff are unskilled or unhelpful. All those we dealt with tried to help. It’s just that there are massive disconnects in their spatial knowledge about rural areas. By way of example, the bloke we spoke to first in the Philippines mentioned at one point that he’d never come to Australia ‘because it’s too cold’.

Saturday 12 November 2011

Shearing 2011

The main shearing for 2011 on Ochre Arch was completed Monday through Wednesday of this week. Once again Heathcote Shearing Contractors provided the team of workers, with our role being primarily to have the sheep ready each day. We also help out in the shed and are available to assist as and when appropriate.

This year we decided to have ALL of the sheep (ewes, lambs, ewe hoggets and rams) shorn during the period given:

  • Experience last year with some lamb losses due to the impact of seed burden from the native Corkscrew Grass. These plants are currently seeding. This year we are managing the grazing plan differently to (hopefully) avoid a repeat and have been assured by many that shearing the lambs (not done at this time last year) will help.
  • Forecast for a relatively wet summer (although not as wet as lat year) which can mean ideal fly strike conditions. Having the wool short should help. That said, our sheep have been bred to minimise the risk of fly strike - plain bodied (less wrinkles to trap moisture) and more 'open' wool (able to dry out faster after rain)
  • Shearing the lot at once means that all the animals are aligned and we thus minimise the number of times  we have to arrange for shearing each year - hopefully to just the once. We do have them crutched on a needs basis.
Our shearing this year was more complex because of the constant threat of rain and our desire to make sure that lambs were not away from their mothers for more than 24 hours at a time - much easier said than done, but preferred given the lambs are not yet weaned i.e. they are still sourcing milk from their mothers.

On Sunday we drafted off sufficient ewes for a full days shearing and shedded them overnight - with some in the shearing shed and the balance in the solar shed which we'd fenced on a temporary basis specifically for this purpose. We are pleased to know that we can now shed enough sheep for a full day's shearing. Here you can see some of the ewes in the solar shed.
The team of workers for Monday comprised Howard (wool classer - lives locally), Nicole (roustabout - from Germany currently 2 months into a 12 month working holiday), Belle (trainee roustabout - originally from Gilgandra), Eddie (shearer - based at Dubbo and originally from New Zealand) and Tim (shearer - lives locally). In the following photo you can see from left to right: Tim, Eddie, Howard, Belle and Nicole.


On Tuesday Tim was replaced by another local shearer, Michael.

For Belle, Monday was only the second day she'd been in a shearing shed or near sheep with the first having been on Sunday when she spent half a day helping by sweeping the board for the shearers. Sheds like ours are ideal for learners as the pace is less hectic. We quite like the idea of having learners on our place as there is a great need for more people in the shearing industry and they have to learn somewhere. The new skill Belle worked on acquiring during Monday was how to 'throw' a fleece onto the wool table. This is not at all easy and we gave her full credit for trying hard, staying focused and willingly seeking coaching all day. Here is a photo of one of her early attempts. One of the trickiest aspects is to hold the fleece together and get the whole thing onto the table. In this shot the neck area didn't quite clear the edge of the table ... but almost!
A critical part of the shed work is preparing the wool for sale. The wool classer is the key player in this respect. That said, we are also fortunate in that our wool broker (Rowan from Jemalong Wool at Forbes) takes a very active role as well and comes out to see the condition of the wool on the first day of shearing and to give guidance to the wool classer where appropriate. If the wool is classed the way the buyers like it then this does translate into a better price for us. Here you can see both Howard and Rowan skirting one of the fleeces on the wool table whilst discussing what the wool was like and agreeing the classing criteria. Not all wool classers are open to suggestions from wool brokers - no problems at all with Howard though, who takes considerable care and attention in performing his role. 


In this photo you can see some of the shorn sheep waiting to be returned to the paddock as well as some of those who were soon to enter the shed. Quite a contrast!


In days gone by it was the role of the farmer to have available equipment in the shed enabling the nominated 'expert' or in some cases the shearers to sharpen the combs and cutters used in the hand pieces. Times have changed and it is now the case (there are some exceptions) that all shearers have their own grinders, with most sharpening taking place after hours. Eddie asked if it would be OK if he set up his grinder in the shed and did the sharpening during lunch. Fine by us. Here's a photo of him 'in action' on the sharpening. We hope that he doesn't one day learn the hard way the benefit of wearing safety glasses!

In the interest of work efficiency the wool classer has to quite early on determine the type of wool that is to become the 'main line'. It is these fleeces that go directly into the wool press to avoid double handling. The remaining lines are stored in 'bins' until either there is enough stored in one to create a complete bale or the end of the shearing. The following photo was taken at around 9.00 am on day 2 (Tuesday) and shows what by that point had been stored in the bins.


We hire our woolpress and this year sourced one from Young Shearing Supplies and Woolpress Hire. All went well in this regard.

The ewe hoggets were shorn after the ewes. It was then on to the lambs. Whilst our lambing percentage was down on prior years we are very pleased with the growth and condition of the lambs we do have. Here you can see a group of them in the yards just after we drafted them from their mothers.
Only a few of the lambs were shorn on Tuesday. Thus almost all of Wednesday was devoted to lamb shearing. It was not necessary due to the shortness of the lambs wool to have a wool classer at hand and the roustabout workload was also much less. Thus the team on Wednesday was just Michael, Eddie and Belle with us taking the main role in penning up the lambs. Shearing the lambs makes them look like 'real sheep'. Here's some post shearing.

Earlier this year we changed ram supplier. Some of the rams have genetics from the Konsortium Merino group in South Africa. One of our ewe lambs for some reason stands out as having something special about her - assessed in terms of growth rate, wool growth, absolutely no wrinkles and fine features. She was the only one to have grown sufficient wool within a maximum of 10 weeks such that the fleece could potentially have been thrown onto the table. At marking about a month ago she literally hurdled two fences in the sheep yards and we at that time named her 'Springbok' reflecting the country of her genetics. Given Belle is still a bit anxious about sheep having not worked with them we caught Springbok and got her to hold her for a while. Thus this photo:

After the lambs were shorn it was then time for the rams. You can see in this photo that the are very substantial animals with horns to match. We had hoped to trim the horns but decided to defer this for the time being.

Arrangements are in place to have the wool bales collected this coming week and most of it will be sold at auction shortly thereafter.

Our remote power supply system once again handled the power demands of the shearing effort. It was overcast on Monday and Tuesday which did mean that the diesel generator kicked in late Tuesday. This did create a tad more 'excitement' than we'd planned. We had the lambs penned up in the solar shed at the time. They were spooked by the noise and all rushed into the temporary fence breaking the wire. By the time we got to them about half had escaped and we ended up placing those that had escaped in the shearing shed. Such is life! Being on remote power does at times have its advantages. On Monday due to a lightning strike a fair chunk of New South Wales was blacked out during the day ... including our area ... and we motored on totally unaffected.

In closing ... a big thank you goes to Jan's sister Ros who was a great help with the sheep work in the paddock.

Friday 11 November 2011

Preparing for Shearing 2011

This year we decided to 'bite the bullet' and finally fix the concrete floor in the shearing shed prior to shearing.
It proved a fairly labour intensive activity.

The first step was to remove the old concrete floor. It turns out that the original construction method was basically:

  • Create a layer of sand
  • Bring in rocks, presumably from off the farm somewhere, and set them up so that the tops were reasonably level
  • Fill the gaps between the rocks with more sand, creating a relatively level surface
  • Pour a layer of concrete on top and level off as best as they could
From what we could see the old concrete most likely had no cement mixed into it and was more like a mortar. It certainly was not reinforced in any way. Whilst we did borrow a jackhammer to help break up the old surface it proved a bit of over-kill in that the old material shattered making it time consuming to move out of the shed. We ended up cracking the old surface with a crowbar and moved the material in pieces.

A big question was 'What to do with the old material'? The answer ... something useful without carting it too far away. It turns out there's a deep hole in one of the creeks not far from the house that continues to get bigger each time we have a major fall of rain. The 'fill' is clean and comprises the concrete and some of the rocks. Here you can see us off-loading some of the stuff from our trailer. With luck the hole in the creek will now no longer get any bigger.

The following photograph is a progress shot in getting the surface ready for the blokes who we selected to lay the replacement concrete. Basically we re-used most of the rocks but buried them in the old sand. On the right side of the picture you can just see the level sand surface. As the new concrete was to be 100 mm thick we used several pieces of baling twine to act as the leveling guides together with a piece of timber that was 100 mm wide, dragging the latter across the surface to finish it off.

All in all it took us a day to remove the old surface and two days to level the sand.

Next step was for the professional concrete company (Makcrete Concrete Services in Grenfell ... they were excellent) to prepare the level surface prior to the concrete pour. Here you can see the result, with the plastic layer in place overlaid with the steel reinforcing. Nice job!

Then it was time for the concrete pour, and here's an action progress shot.
The chute from the concrete truck is visible in the foreground. In the background you can see Justin and Matt flat-chat moving the slurry into place quickly before it set. One thing about concreters ... they certainly earn their money at this point!

Once all of the concrete was roughly in place and fairly level Matt uses a 'bull float' to do the initial final level (if that makes sense). Here he is in action:

Over the next couple of hours as the concrete cures an automated trowel (AKA helicopter or whirly bird) is used. It serves to properly level the surface, force the gravel under the surface and create a proper surface prior to drying. Here's a link to a short video of the machine (guided by Justin) in action: 

After 3 days the new concrete was ready for use. Here's a shot of the final product. Perfect!

The other major non-routine task getting the shed ready was repairing the roof on the skillion on the western side. When originally constructed second hand iron was used. Thus there were plenty of holes to fill in using silicon, and it also proved necessary to replace a whole bunch of nails and screws. Another aspect was that a year or so ago the flashing that covered the gap between the main section of the roof and the skillion blew off in a very strong wind storm and needed replacing. The question was: "How to do this cheaply, effectively and in a way that continued to allow light into the shed"? The answer took a long time to come up with but was very simple in concept: take one piece of poly-carbonate, cut lengthwise into 4 equi-strips, and install using specially designed screws used solely on poly-carbonate sheeting. In this photo you can see the final product.
During the shearing earlier this week (further blog to come) the poly-carbonate solution proved to be just what we needed ... especially given that it rained a few times.

Tuesday 13 September 2011

Removal of Stump from Large Sugar Gum

Further to our blog of 1st September 2011 sharing some of the details of having the large Sugar Gum tree out the front of the house here removed - today Maurice from Lachlan Valley Tree Services returned with his trusty  stump grinder to remove the stump.
Here you can see the 'Red Roo' SP8018 stump grinder positioned over the stump prior to the start of the job. These 80 horsepower machines cost on the order of $80,000 and are a serious bit of gear.

Here is a close-up of some of the 32 tungsten tips 'teeth' on the cutter wheel. They comfortably handle timber and soil, and can be used for cutting rock and concrete - but the latter is tough going. Steel if in the soil or timber causes considerable damage to the teeth.

The machine is controlled via this handy wireless remote control unit.

You'll find a short (6 seconds) video showing the stump grinder in action here.

The above photograph was taken about half way through the removal process. The dark area you can see in the middle of the stump is a large white ant nest.

Here's a close-up of a section of the white ant nest.

The above photo was taken at the completion of the grinding effort. There was a very large amount of wood chips mixed earth with produced during the process, with the actual stump proving to have been about 50 cm deep in all.

We agreed with Maurice that we would move the excess mulch ourselves. Here you can see our trusty trailer almost fully loaded.

We moved the mulch to a couple of 'scalded' areas of bare earth in the Yabby Dam Paddock. One spot is below. Our hope is that over time this added organic matter will encourage vegetation to grow and rainfall runoff to reduce.

The photo above is one of the other scalded areas in the Yabby Dam Paddock just to the west of the dam, with the mulch placed at the down-side of the contour bank.

The vast majority of the timber in the stump is pulverised into quite fine pieces, but you can see in the above photo that some pieces are pretty 'chunky'. This happens when pieces break off rather than be ground off.

The above shot shows the 'finished product' after we'd removed the excess mulch and done a tad of leveling. We do expect that over time the material that is in the hole where the stump was will compact and break down. At that time we plan on bringing in some topsoil to level things off again.

It's good to now have the whole job of removing the massive and dangerous tree complete.

Tuesday 6 September 2011

Bees, Wattle and Emus

Earlier this morning we checked our lambing ewes up in the Big Pine Paddock. On the way back we saw something light blue and out of place in the distance in our Spring Paddock and drove up to investigate.
It transpired that what we were seeing (above) was 27 bee hives left in the paddock left without our knowledge or permission. All of the hives had a common number on them which we deduced was a registration number. A quick search of the internet brought to light some contacts in the NSW Dept of Primary Industries who are involved in regulating the bee industry. A call to the main contact for NSW resulted in us being given the name and phone number of the bloke who owns (unless the hives have been sold or stolen) the bees. He lives in Bathurst and we have at this point left a message with his daughter for him to ring us back.

This afternoon we walked up to the Spring Paddock to see if the hives were still there. They were, and we took the photographs in this blog post. On the way there we walked past the enclosure we constructed last year where we transplanted some wattles. Of the 10 we transplanted from roadside reserves 4 are thriving and one was in full flower as you can see above.
As we approached the spring we saw 5 emus near it (above), all of which seem to have recently decided to call our place home. The spring is the most easily accessible permanent water point in the north east part of our place and it seems this is where they are regularly coming for water.

At the spring itself it was a bit of a surprise to see and hear just how many bees from the hives were sourcing water there. It was truly 'buzzing'. On the way from the spring to the hives there was quite a flow of two-way bee traffic. At the hives themselves we took a 12 second video which you can access of YouTube here. We also took a close-up still shot of one of the hives (below) where you can see the access point into the hive itself.
It looks a bit like honey around the entrance but we are not sure.

Monday 5 September 2011

Bird Habitat Clusters Constructed and Planted


In July this year we entered a Management Agreement with the Lachlan Catchment Management Authority to establish ten 10 by 10 metre bird habitat ‘clusters’ spread across 7 paddocks located to the north and east of the farm. Each is to contain trees and shrubs, and collectively they are designed to act as ‘stepping stones’ allowing native birds to move more safely across the broader landscape. Funding toward the fencing and planting comes ultimately from the Federal Government’s “Caring for Our Country” initiative.

Once the Management Agreement was signed we set about putting in all the posts and strainers at each cluster location. To make this easier we made up a template out of baling twine that would allow us to easily locate where the posts should go and ensure each was in fact square and 10 metres by 10 metres. For the fans of algebra we used the formula for triangles of A2 X B2 = C2, and physically tied knots in the twine at 5 metre intervals for two sides (each 10 metres long) then a gap of 14.14 metres for the hypotenuse.
In the photograph above you can see the final / standard layout of the posts and stays at each site.
Here you can see the stay arrangement we used. These are specifically designed to be ‘temporary’ and were manufactured for us by M A Steel at Young. The original design was from David Marsh at Boorowa who uses them for temporary electric fencing.


You can see in the above photograph that top of the stay is slipped over a star post and attached with wire. The base is anchored using another star post, visible in the second photo above/

One component of the project involved ornithologist Tony Saunders calling to assess the property for birdlife potential and to share his knowledge. When it came time to select the species to plant we sought his additional input as we wanted to make sure we maximised the value to our local birdlife from the exercise. Here is a selection of his comments … which of course we found most helpful:
  • "Go with the 3 trees and 10 shrubs for each 10m x 10m cluster.
  • Make each cluster planting as random as possible. This will put some shrubs in shade and others in full sun, as well as provide some clusters with scattered shrubs while others will have a patch of dense shrubs.  Make them as different as possible.  It would be interesting to monitor the clusters through time and see how effective they become for wildlife.
  • I suggest a mixture of shrubs from the approved list for your area.  The shrubs should be predominantly Acacias, but the species should not aim for equal numbers of each.  In natural areas there is generally a dominant species followed by lesser numbers of subordinate shrub species, so I suggest planting the 10 shrubs in a ratio of 4:3:2:1.  The actual species can be selected from the list to match the closest existing similar patch to the cluster.
  • Based on the location of the proposed clusters and what I recall from the location of existing tree species, I suggest that the tree species should be as follows: Front, Saddle, Duck Dam and Yabby Dam -  2 Grey Box and 1 Yellow Box per cluster; Yellow Box  -  3 Yellow Box per cluster; Crater and Plateau  -  2 White Box and 1 White Cypress Pine per cluster

The shrubs within each cluster should provide some passage habitat for small birds, and the White Cypress Pine/Gum mix will provide for the Grey-crowned Babbler.  The clusters are probably too small to provide sufficient resources for residency by small birds.  Glossy Black Cockatoo prefer large, dense patches of Allocasuarina species, and I doubt that they will find much use for the suggested clusters."

Armed with the above information we set off to acquire what plants we could. It eventuated that we could not source two species of shrub, Silver Casia and Angular Hopbush, so we substituted these for Wedge Leaf Hopbush. Suppliers were Gum Tree Nursery at Young and Oz Plants at Cowra.

Another important aspect was how best to actually do the planting and what materials and treatment to apply. Matt Kilby from Global Land Repair was who we went to for advice and supplies. Here’s a summary of the planting process we used:
  • Dig a hole about 400 mm deep and 30 cm across
  • Create some bull swales out both sides from the hole which will channel runoff into it when it rains in the future.
  • Mix a cup of tree starter into the loose soil that will go back in the hole when planting the tree.
  • Have a mix of tonic in a bucket. Soak the plants whilst still in the tube in the tonic mix to ensure the soil in the plant tube is completely hydrated.
  • Remove the plant from the tube and spread a heaped tablespoon of the soil mycorrhiza around the soil covering the tree roots and at the base.
  • Plant the tree in the hole with the base of the tree below natural ground level. Make the remaining hole ‘cone’ shaped so that water will run in it naturally and large enough to hold about 10 litres of water.
  • Make a hole in the centre of the mulch mat that will end up being where the tree stem comes through. Place the mat in the cone shaped hole around the base of the tree. The pre-cut bits of the mat should thus overlap slightly.
  • Place the tree guard over the tree and drive in the stake.
  • Pour about 5 litres of mixed tonic at the base of the tree.

We recently finished all of the work. The biggest unexpected learning from doing the planting was seeing the diversity of soil types and profiles when digging the holes for the plants, down to about 30-40 cm. They range from heavy clay, to sandy loam, to coarse 'breaking down' granite.

What follows are photographs of each of the clusters by paddock name and cluster location together with some shots of what the soil profile looked and plant species that were put in the ground. All of the landscape photos have been taken in the direction rain water will naturally flow when it does rain i.e. from the high side looking down-slope. Thus the photos are indicative of the aspect of that particular piece of land and it will be relatively straight forward for us to take subsequent monitoring photos from approximately the same position should we choose to.

1. Crater Paddock – East
Here's the Crater Paddock - East cluster. The Weddin Mountains are coincidentally just visible on the horizon on the right hand side.

Here's the first soil profile sample. Breaking down granite toward the bottom.

Here's the second soil profile sample. Breaking down granite toward the bottom mixed with a type of light grey clay.

The plant species put into the soil in this cluster were: White Box, 2, White Cypress Pine, 1, Currawang, 1, Varnish Wattle, 3, Wedge Leaf Hopbush, 2, Western Golden Wattle, 4, Aspect SSE

2. Crater Paddock – West
Here's the Crater Paddock - West cluster. The Bogolong Hills are visible in the background.

The soil profile at this location is weathered granite but a brighter ochre colour.

The plant species put into the soil in this cluster were: White Box, 2, White Cypress Pine, 1, Currawang, 2, Hickory, 4, Varnish Wattle, 3, Wedge Leaf Hopbush, 1, Aspect SE/Flat

3. Duck Dam Paddock

The Duck Dam is visible in the background, quite full at the moment.

The soil profile at this cluster has a high clay content. In one place we noticed what seemed to be a fine salt layer at around 30 cm which immediately preceded what we call 'cement rock' - an impervious layer best described and compacted clay. It proved necessary with two of the 13 holes to use the crow-bar in order to get sufficient depth.

The plant species put into the soil in this cluster were: Grey Box, 2, Yellow Box, 1, Currawang, 3, Varnish Wattle, 4, Wedge Leaf Hopbush, 1, Western Golden Wattle, 2 Aspect North

4. Front Paddock

At the back of this view of the cluster in the Front Paddock can be seen the hill that has Lookout Rock on it, and in the mid-ground a few quite impressive Yellow Box trees.

The soil profile at this cluster was very damp heavy clay, which made for the toughest digging as it was quite labour intensive to remove the material from the auger. The above photo was taken the day after planting had occurred and some drying of the soil had occurred.

The plant species put into the soil in this cluster were: Grey Box, 2, Yellow Box, 1, Currawang, 4, Varnish Wattle, 1, Wedge Leaf Hopbush, 2, Western Golden Wattle, 3, Aspect, S

5. Plateau Paddock – East

At the rear of this cluster can be seen the trees in the gully below what is normally a dry dam, and across to the Crater Paddock.

Here you can see the coarse broken down granite sub-soil at the rear of one of the plant guards. This was particularly easy digging. Also in the photo is the mini-bull-swales created to channel runoff to the plant thus theoretically reducing the need for watering of the plants in the early stages.

The plant species put into the soil in this cluster were: White Box, 2, White Cypress Pine, 1, Currawang, 2, Varnish Wattle, 4, Wedge Leaf Hopbush, 4, Aspect, NNW

6. Plateau Paddock – West
The view from this site is similar to the last with the exception that a neighbour's Canola crop in full flower is to the right.

The soil profile was the same as for the Plateau Paddock - East site.

The plant species put into the soil in this cluster were: White Box, 2, White Cypress Pine, 1, Deane's Wattle, 2, Hickory, 4, Varnish Wattle, 1, Western Golden Wattle, 3 Aspect, NE

7. Saddle Paddock

This site is the closest to Goodes Lane and thus the easiest to see by the passing traffic.

The sub soil was wet and quite sandy. This site had an awesome number of active worms detected during digging. This augers well for future pasture health.

The plant species put into the soil in this cluster were: Grey Box, 2, Yellow Box, 1, Deane's Wattle, 2, Hickory, 3, Wedge Leaf Hopbush, 1, Western Golden Wattle, 4, Aspect, SW

8. Yabby Paddock - North

The Saddle Paddock cluster is in the background of this photo (trust me!).

This site was the driest of all, which we attribute to the impact of the contour bank slightly up-hill. In a couple of locations there was a cover of Redgrass which proved quite a challenge to dig through as the plants create a solid mass of vegetation just below the surface. The Couch Grass was also very thick at this site.

The plant species put into the soil in this cluster were: Grey Box, 2, Yellow Box, 1, Deane's Wattle, 3, Wedge Leaf Hopbush, 3, Western Golden Wattle, 4, Aspect, NNW

9. Yabby Paddock - South

A quite similar background to the other cluster in this paddock.


 This site had the most diverse sub-soil profiles of any of the 10 as the above 3 photographs show.

At one point I finished digging one of the holes and went away for a couple of minutes to retrieve another implement. On return I found this 'surprise' at the bottom of the hole. Obviously it had inadvertently entered and was unable to escape. We think it is some type of juvenile Brown Snake but someone else has suggested it might be a type of Legless Lizard. We released it to under a nearby low bush.

The plant species put into the soil in this cluster were: Grey Box, 2, Yellow Box, 1, Currawang, 2, Varnish Wattle, 3, Wedge Leaf Hopbush, 4, Western Golden Wattle, 1, Aspect, NNW

10. Yellow Box

 The above photograph was taken on disk and is not quite as clear as the others. The trees you can see to the left are in Ochre Arch gully. This site will also be visible from Goodes Lane, especially as the trees grow.

The sub-soil colour at this site is a vibrant ochre, verging on orange red. Quite stunning and very friable.

The plant species put into the soil in this cluster were: Yellow Box, 3, Currawang, 2, Deane's Wattle, 4, Varnish Wattle, 1, Wedge Leaf Hopbush, 3, Aspect, N

In Conclusion
We now look forward to watching the plants grow, and in time be used by the birds in the area. On the weekend just gone we did our first watering of the plants via natural syphon from our fire-fighting tank. In all it took about 1.5 hours and as we get better at it we expect the time to reduce to around one hour. Not bad at all, and will be important during the summer months.